 |
 |
Ukrainian
Recipes
|
|
|
Ukrainian
Recipes
|
| RECIPES > VARENYKY > MAKING |
| By now you should have all of your fillings prepared and the dough
is sitting in a bowl, covered with a damp towel. Now its time
to put it all together. One method to get the job done quicker is to have
a "Varenyky Party". After you've given away some of your mouth watering
Varenyky to your friends, they will beg you to teach them how. What
an opportunity. If you can get 2 or 3 more people, forming an assembly
line, it's quite fun and the rewards are great. Three people could easily
make 10 -12 dozen varenyky in about 3 hours, if the dough and fillings
are already prepared. Whereas, one person could probably make 1 to 2 dozen
in an hour. TIP: If you have wine, make sure the refreshments are done after the making part or else you could get some really not so good looking Varenyky. |
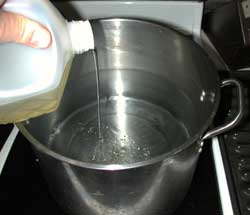 |
BOIL WATER
Get the biggest pot that will fit on your stove. Fill it with water
and bring to a boil. Add some vegetable oil. This will prevent the Varenyky
from sticking together when there are several in the pot. You will need
this pot to be boiling when you start and continue to be boiling the entire
time. Replenish the water when the level drops.. Its a good idea to add
a few cups if you are taking a tea break, then it has time to recover.
|
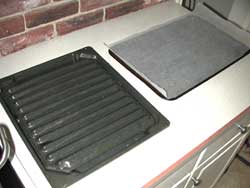 |
PREPARE DRYING AND COOLING AREA
You will need a pan, or towels set out to receive the hot and dripping
wet Varenyky. I use my broiler pan. Perfect to allow water to drain off.
Small cooling racks also work well. If you don't have either, set out some
lint free towels or cheese cloth. Although, you may have to change it often.
|
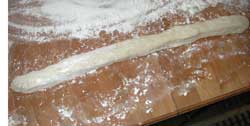 |
ROLL OUT A ROPE OF DOUGH
Sprinkle some flour on your work surface. Pinch off a baseball size piece of dough. Form it into a somewhat uniform rope, 3/4 to 1 inch thick. It does not have to be perfect. |
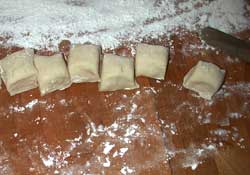 |
CUT DOUGH INTO CUBES
With a knife, cut the rope of dough into uniform cubes. |
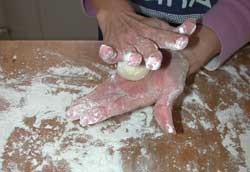 |
ROLL A CUBE INTO A BALL
Pick up one of the dough cubes and roll it into a ball with your hands. |
 |
FLATTEN THE DOUGH BALL
With your palm, flatten out the ball on your work surface. You
should end up with almost a perfect circle of dough.
|
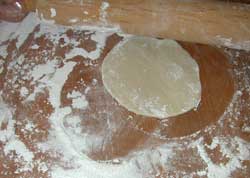 |
ROLL OUT THE DOUGH
With a rolling pin, dowel rod or jelly jar, roll out the circle of dough. How thick should it be? It is really something that you have to learn on your own. Too thin and they fall apart when you boil it. (This will be very evident. Your Varenyky will be just a big noodle. A very tasty big noodle, but a noodle just the same.) If you make it too thick, they will be difficult to cook. The outside will be tough and the inside will be raw dough. It also wastes a good deal of dough and the number made will be much less. It takes practice. |
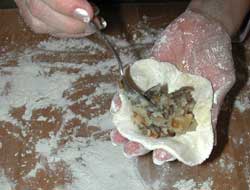 |
SPOON THE FILLING
Scoop about 1 heaping spoonful of your chosen filling in the center of the dough, holding it as shown in the diagram. Keep it concentrated in the middle. You will be able to evenly distribute it once the dumpling is closed. Its important now to keep it in the center away from the edges. |
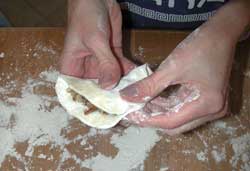 |
FOLD AND CLOSE
Fold the dough in half, pinching the Varenyky shut along the edges as shown in the photo. Keep the filling away from the seams. Use your fingers and pinch it firmly closed. The seam should be about 1/4 inch to 1/2 inch wide. If it doesn't seem to want to stick together, then make sure there is not too much flour on the edges. If they look clean and it still won't stick then your dough does not have enough liquid. Put all the dough back in the pan. Sprinkle a generous amount on the dough and knead it for a few minutes. Then, try again. |
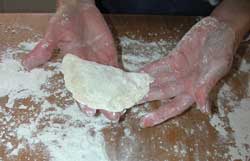 |
PAT FLAT
Pat the Varenyky to distribute filling evenly inside the dumpling. There should be no holes in the dough. If there is , you can try making a little patch. Double check the seam, it must be sealed or all the filling will leak out. |
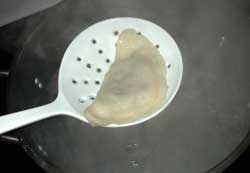 |
BOIL THE VARENYKY
Using a wide slotted spoon, lower the Varenyky into the boiling water. Doing it this way, it keeps it from being damaged if it was just dropped into the pot, as well as keeping you from getting burned. Once in the pot, give the water a gentle swirl. This keeps it from sticking to the bottom when it first gets in the water. We like the plastic spoon better over a metal spoon. The metal spoon has a sharper edge and is more likely to accidentally cut the Varenyky. |
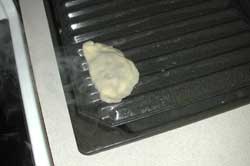 |
COOL AND DRY
When the Varenyky is completely floating flat on the top of the boiling water its time to use the wide spoon, scoop up the dumpling from the underneath and lift it out of the pot. Allow it to drain for a few seconds. Then lay it gently on the drying tray. When it is cool enough to touch, flip it over to allow the other side to cool and dry. I keep moving them to one side of the tray as they cool. This way, when they reach the end they are ready to move to the final freezing tray. TIP: Set up a fan to blow lightly over the drying tray, it speeds up the process. |
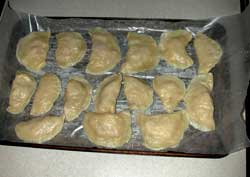 |
FREEZE OPTION
If you are not going to prepare these to eat in a day or two, it is best to freeze them. Once dry, stack them on a cookie sheet or a pan small enough to fit in your freezer. Stack the Varenyky in layers between wax paper. Freeze overnight and then remove them from the pan, placing them in zip lock freezer bags. Then its back into the freezer until they are ready to cook. |
