STEP 1 Mark The Center
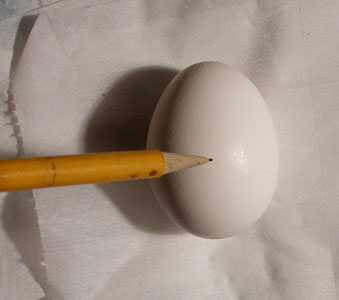
FIG 1 |
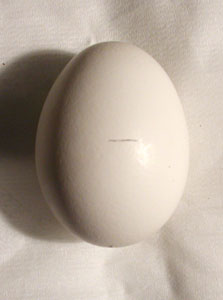
FIG 2 |
Lay the egg down on the table, as shown in FIG 1. Look directly
down over the top of the egg. Using your best judgment, make a light
mark on the egg in the middle with a mechanical pencil (FIG 2).
Don't push hard, just use the weight of the pencil to make the mark. You
could also use a divider caliper or lay a ruler down on the table
next to the egg. However, It doesn't have to be perfect.. I have found
that most people can judge the middle within an eighth of an inch. |
STEP 2 DRAW THE EQUATORIAL LINE
In Step 1, the middle of the egg has been designated, now we need to
use this mark to draw a line completely around the egg. This line divides
the egg in two, a kind of equator. If you have a Craft
Lathe, this is where you would use it. If you don't, a
Thick_Rubber-Bandwill
do the job. Slide the Rubber Band over the egg, up to the mark drawn. Rotate
the egg (FIG 3) and nudge the band so that the top of the band is level.
You should be able to turn the egg and the top edge of the rubber band
should remain straight and level. Next, taking the mechanical pencil, rest
the tip along the top edge of the band and drag it around the egg, using
the lightest pressure on the pencil. When completed,carefully remove the
rubber band. There should be 1 line drawn completely around the middle
of the egg (FIG 5) and it should be as straight as the rubber band was
placed. This line is very important. If this line is off center or
angled, your entire design will be equally as off center and angled. Compare
it to a foundation of a house. If your foundation is unleveled, the house
will never be true.
The key is to take your time and get the rubber band
straight. |
STEP 3 MARK THE END CENTER
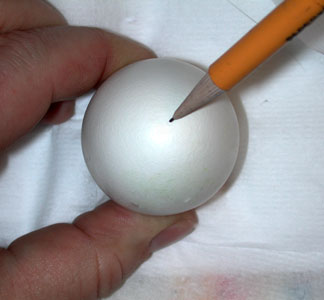
FIG 6 |
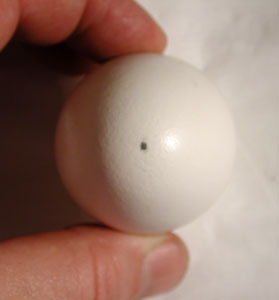
FIG 7 |
Time to use your dead reckoning skills again. Hold the egg on its end and
look directly down.at the end (FIG 6). The profile of the egg should show
almost a perfect circle.Using the mechanical pencil, mark the center
of the circle (Shown in FIG 7) |
STEP 4 DRAW THE FIRST LINE SEGMENT
If you have a template set, use it now to mark all 4 division lines before
you continue on with this step. CLICK HERE
to see how.
Hold the egg in your non-drawing hand so that the equatorial line and
the end point are both visible, (FIG 8). For this step, you will draw a
line from the middle line to the end point. Whenever drawing on the
egg with a pencil or kistka, you want to know 2 things, the starting point
and the end point. In order to draw a straight line, you have to
see both points. Place the pencil on the line and making light, short strokes
(perhaps 1/8 inch to 1/4 inch in length) draw a line toward the end
point. It doesn't have to be drawn as a complete line , short dashed lines
will do as well. When the line is complete, it should be perpendicular
to the equatorial line (FIG 10) . If its not, then either the equatorial
line was not straight or the end point was not selected correctly. However,
do not be too upset if it's not straight. This step requires practice and
it may require a few eggs to get the hang of it. Practice on eggs that
you don't plan to use. Making scrambled eggs? Before you break them,
draw on a few egg shells. |
STEP 4 EXTEND THE LINE SEGMENT
Now you want to draw that line down the other side of the egg. Turn the
egg so that you can see the line just drawn (See FIG 11). Forget you are
drawing on a curved surface and visualize that you are just extending the
line. If it helps, retrace your pencil over the line already drawn, continuing
the motion, making short extensions of it, perhaps 1/8 inch
to 1/4 inch at a time. Rotate the egg down gradually as you extend the
line (See FIG 12). Continue the process until you reach the equatorial
line. It should meet at a right angle (FIG 13). |
STEP 5 DRAW FIRST INTERSECTING LINE
Turn your egg back up on the end (FIG 14). Visualize a box sitting on that
line with its corner on the end point. Make a short stroke up the side
of the box .Rotate the egg down and continue to draw in short short
light strokes, retracing over the line previously drawn, working toward
the equatorial line (FIG-15). When the line reaches the midpoint
, it should intersect at a right angle (FIG 16) |
STEP 6 EXTEND THE INTERSECTING LINE
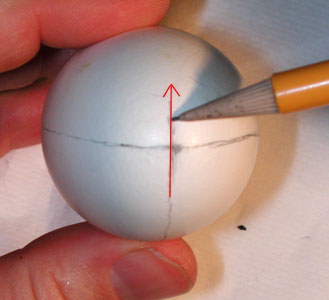
FIG 17 |
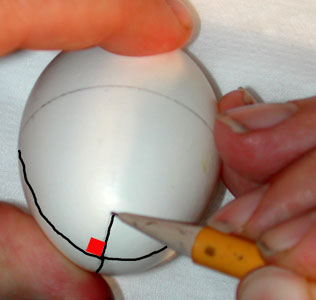
FIG 18 |
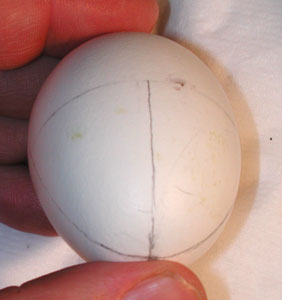
FIG 19 |
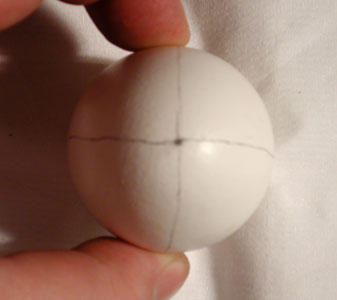
FIG 20 |
Rotate the so that the line just drawn is on the bottom. Like in Step 4,
forget you are drawing on an egg and continue to draw in a straight line
in short strokes (see FIG 17). The line should be perpendicular to
line you crossed (See Fig 18). Continue to extend the line until it meets
the equatorial line (See FIG-19). This completes the lines for half
of the egg, dividing the half into 4 equal parts. (See Fig 20). |
STEP 7 COMPLETING THE SECOND HALF
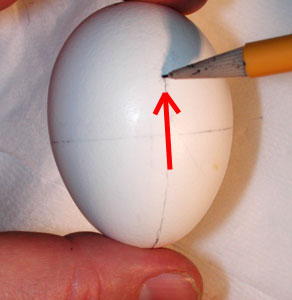
FIG 21 |
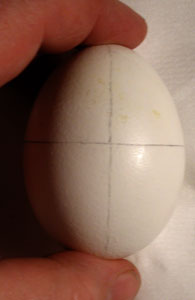
FIG 22 |
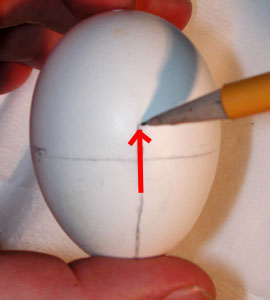
FIG 23 |
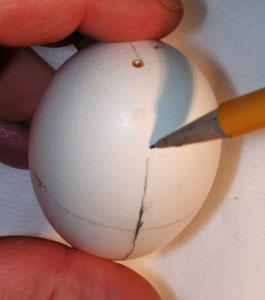
FIG 24 |
Completing the first half establishes 4 points around the equatorial line,
equally spaced. Lay the egg flat, with the completed half toward you. Using
the same technique for extending a line, draw short strokes on one of the
lines continuing the motion toward the end of the egg (See FIG 21).
After drawing the line, check your work. It should be straight and perpendicular
to the equatorial line (See FIG 22). Now rotate the egg to the other side.
Do the same process extending the line (FIG 23). Now tilt the egg toward
you (FIG 24) and target the end of this line to meet the line from
the other side. Rotate the egg 90 degrees and repeat the process for the
other 2 lines. |
COMPLETED DIVISIONS
Your completed lines should resemble this, although your lines shouldn't
be this dark. We purposely darkened them in the pictures to make
them show up well for the camera. Also, as you can see, the more graphite
you put on the egg, the dirtier it gets. Trace the lines with just enough
pressure to make them slightly visible. Dashed lines are more desirable.
Don't fret if your lines are not this straight. It just takes a little
practice. I sometimes do 2 or 3 of these at one time and the last
ones are always better than the first. Now you are ready to continue on
with your Pysanky design. |


