FIGURE 23 |
STEP 12
SECOND COLOR
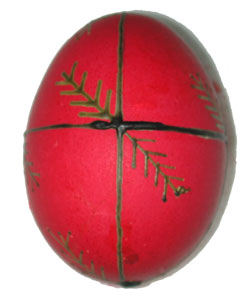
Having finished with all of the yellow symbols, the next step is to dye
the egg for the next color. We choose red, but you may choose another color.
However, a light color is recommended to contrast with the final egg color.
Colors like Dark Blue or Purple do not contrast with Black our final color.
However, Light Blue, Light Green, Turquoise, Pink or Scarlet would be acceptable
selections. Dye the egg as you did in STEP 10, placing the egg carefully
in the jar and allowing time for it to completely dry before proceeding
to STEP 13. It should look something like FIGURE 23. |
|

FIGURE 24 |
STEP 13
CURL PRACTICE
While your egg is in the dye or drying, pick up a felt tip and lets
practice the motion of a curl about 10 or 20 times. I'm a chronic
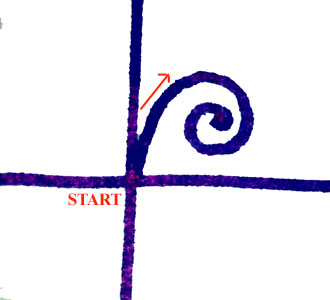
doodler and these are my favorite doodles. Start at the middle of the intersection,
draw along the line, gradually pulling away. Sort of like an airplane at
take-off. Then start your curl down and curl in like a yummy cinnamon bun
. You are trying to center the curl between the vertical and horizontal
lines (FIGURE 24). No question, it takes practice to get familiar with
the motion. Practice... Practice .... Practice....
|
|
STEP 14 DRAW THE CURLS
Now your Pysanky in process is freshly dyed
in your 2nd color (Red in our example). It should be completely dry and
ready to draw all lines that will be that color. Start by filling your
kistka with wax and heating it thoroughly (STEPS 4 & 5). Position the
egg as shown in FIGURE 5. Before you place the kistka on the egg,
examine your egg and imagine in your artistic mind how you are going
to draw this symbol. From experience, I can say that the best curls that
I have made are those that are drawn in one continuos motion. That's why
its important to have enough wax in your well and hot enough to go
the distance on the curl. Start at the intersection, this will cover up
any minor blob of wax that may be hanging on to the tip of your kistka.
Move up along the line, diverging gradually. Then start the curl and quickly
coil toward the center. Some people prefer, (myself included) to tilt the
egg (FIGURE 26 - Green Arrows) in combination with the movement of the
kistka to complete the curl. All that I can say is to try it both ways.
At the end of the curl, put a large dot in the middle. When completed,
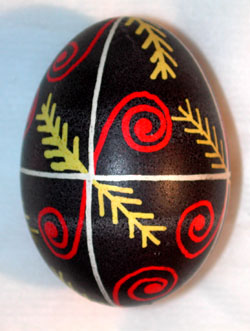
your curl should resemble something like that in FIGURE 27. Next, flip
the egg around (FIGURE 28) to draw the other Curl on that intersection.
The curls don't have to be in pairs, but when they are, it looks better
to try to make them look as though they are one continuous design. This
is done by making the connecting curl flow into the other. As shown by
the green arrow in FIGURE 28, retrace your kistka lightly over the existing
curl when starting the second curl, making one continuous movement. The
result should look similar to FIGURE 29. Now roll the egg over to
the next 3 intersections and repeat the process. When completed,
draw curls on the bottom and top of the egg, (FIGURE 30). When finished,
you should have completed 12 curls. |


